Have you ever made flowers with clay? Many brands of air-dry clay can be made into very thin, translucent petals that are also strong. "Craft Ideas for All" has a nice little tutorial for creating roses and cherry blossoms to make the pretty arrangment shown here. Other posts on their blog indicate that they use both Delight clay and Deco clay for their flowers.
Wednesday, November 16, 2011
Arrangement: Clay Roses & Cherry Blossoms
How to Make a Strand of Clay Flowers
This is a 2-part video from msedcolor (Simply Chic Lily) demonstrating how to make simple flowers and then connect them into a strand of flowers.
Carnation tutorial by Priya
Step-by-step tutorial for creating clay Carnations by Priya Nanthakumar. Priya uses air-dry clay to create the flowers. She doesn't specify which air-dry clay she is using but there are many suitable brands. DecoClay is a popular one for flower-crafting. Homemade cold porcelain is also popular.
Cold Porcelain Roses by Lydia
Today we have a video slideshow from Lydia, demonstrating her method for creating cold porcelain roses. The instructional text in the video is written in 4 languages. You may have to use the PAUSE button in the video player to stop slideshow long enough to read text.
Craft Porcelain Roses by Linda Peterson
 |
| Clay Roses by Linda Peterson |
Poppy Tutorial by SifBeth
6/21/2012 SifBeth's website seems to be offline for repairs due to a crash. Below is the poppy tutorial gleaned from the WayBack Machine.
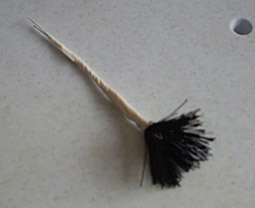
Wrap a piece of black cotton thread some 50 times around two fingers. Not too tight! Now you have a loop - fold it in half and twist a piece of gauge 33 floral wire around it. Make sure you remember to leave an extra loop on top of the wire - I forgot in this picture. You need it for the flower centre.
Cut the loop open and tape the bottom and the stem. If you look carefully you can see the little white loop in the middle of the thread..
Roll a small ball of spring green gumpaste for the centre. Give a slight UFO shape and glue it to the loop in the centre. With a pair of tweezers, pinch the gumpaste to form the typical poppy pattern.
Now the petals. Cut out two large an two smaller petals. Frill the edges with a large frillstick and vein with either a silicone veiner og, as here, a dresden tool. Leave to dry in a curve over a ball of cling wrap or in a flower former.
When dry, paint the bottoms with a bit of undiluted black paste color. Or black petal dust if you have any (if you do, please tell me where you found it!)
For assembly, tape the smaller petals around the base, opposite of each other. Turn the flower a quart and tape the two larger petals just underneath. Tape the whole stem. And voila!
Subscribe to:
Posts (Atom)
Remember! Air-dry clay and gumpaste techniques are almost the same
and tutorials can work for both!
and tutorials can work for both!


